How to Crate Train Your Puppy with a Clicker. Now.

Duration:
Minimum of one week, up to a month or two.  

Supplies Needed For This Training:

Check out my Pre-Puppy Checklist to see other essential supplies.

Why Crate Train?
Crate training your new best friend is one of the most important things you can do for a new puppy. When you crate train your pup, you’re giving her a home, a safe haven, a place she can hide while you’re singing Katy Perry’s Roar. It's also a safe place for the pup to be while you're at the bar getting hammered.

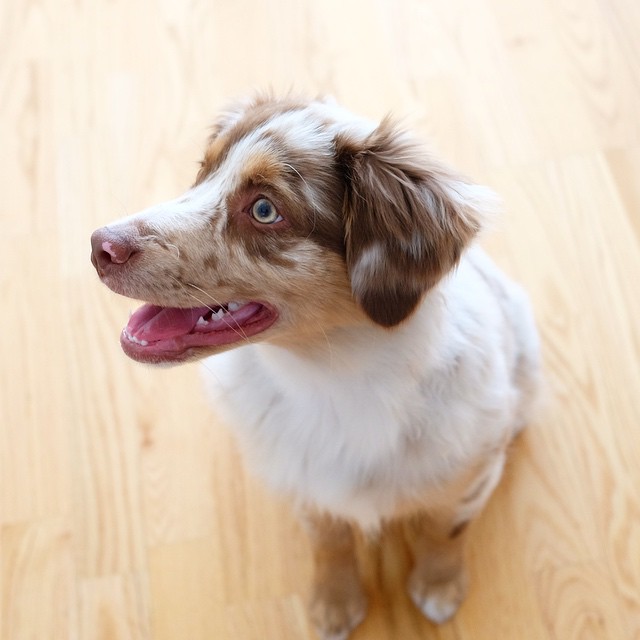
Most importantly, it teaches your pup how to be potty trained. Crate training doesn’t happen overnight, but you should be able to see some results relatively quickly with this method. I’ve seen amazing results from my own happy and well-trained aussie pup - Pippa


Step 1: The crate isn't a cage, it's her own space.
If you just got a new puppy, congratulations! Crate training starts now. First thing you need to understand is that the crate is a happy place. It’s not a cage, it’s not a jail and it’s NOT punishment. You should never use a crate as a form of time-out or as punishment. Were you ever sent to your room for punishment as a kid? Yeah it’s kind of like that. You’re sent to your room with no smartphone, no computer, no internet (gasp). It’s the four walls of hell and it’s the same for your pup - you'll never want to go back. Make it a happy and positive experience. The sky needs to rain Lucky Charms and puke rainbows and unicorns when your dog goes into the crate. Yeah, that good.  

Step 2: Put the crate somewhere good. 
The second thing you want to do is set up the crate in a space where it’s around people during the day time. Your dog is bred to be a social animal. They want to be around people and they want to hang out and be a bro. Setting up the crate around people makes it a less stressful place to be. I recommend getting a crate with two doors, so you have flexibility to move the crate around a bit to find the perfect spot for you pup. More on this later.

Step 3. Adjust the size of the crate.
This next step is important. With the crate I linked, it should come with a divider panel that allows you to adjust the size of the space within the crate. You want it just big enough for your pup to be able to turn around in it. A dog naturally never shits or pees in the same place it sleeps. I mean, you wouldn’t take a crap on your bed and then go to sleep in it right? Yeah dogs are pretty smart. Adjust the size of the space in the crate as your pup grows. Remember the Goldilocks rule, not too big and not too small.

Step 4: Make it comfortable.
Now throw in a soft blanket for her to get comfy and your unwashed t-shirt as well. Listen, it sounds gross, but your dog loves your smell and your unwashed t-shirt will put her to ease with your scent. Don’t have an unwashed t-shirt? Drop down and give me twenty and then run a couple of laps. Problem solved. If you’re getting your dog from a breeder, ask if the breeder can spare a blanket (or you can provide her one when you visit) that was used with her litter mates and her mom. Most breeders should be okay with helping out.

Step 5: Find out what treats motivate your dog.
Okay, now the real training begins. Find out what is considered a high value treat for your dog. A high value treat is often a treat that your dog LOVES over any other treat. With Pippa, we tried kibbles, hot dogs, chopped-up boiled eggs and etc. We found low-sodium turkey deli meat or roast beef to be her favorite. I mean, it’s mine too so like father like daughter right? The trick here is to find a protein for high value treat. You don’t want to dabble too much into things like freeze dried liver, string cheese and etc yet. A new pup will have a sensitive stomach, so food that is too rich, or not protein based will give her the runs. You don’t want the runs. I’ve seen the runs. The runs are baaaad.

Step 6: Loading the clicker. 
Once you’ve found a high value treat, begin associating the treat with the clicker. We call this loading the clicker. Sit down with your dog and get on eye level. I find Pippa to be more focused when I'm eye level with her, it might work with your pup. Next, start clicking and then give her a treat immediately after the click. Give her a small treat, just enough for her to get a taste. You don’t want her to get too full before the training is over. If your dog is a relatively small dog, try some peanut butter on the back of a spoon and let her give it a small lick as a treat. Do this about 20 times. You’ll know your dog “gets it” when you click and they start expecting a treat. If your dog is busy running or playing around, try to get her attention by tapping your fingers on the ground while calling her name in a friendly voice and make your self interesting. You can be interesting, so be interesting.

From now on, the click means “I like what you just did, here’s a treat.” Never use it to get the pup’s attention and use it only when your pup did something good. No free clicks. The pup has to work for her click, essentially working for her food. Nothing is free. 

Step 7: Make the crate interesting.
Now, lure her over to the crate. Use a treat, sing a song, do a silly dance, get your dog near the crate. We will progressively get your pup into the crate. This means, we are not going to shove her into the crate and then click to reward her. We are going to get her to figure out that going to the crate on her own is a reward. To start, give your pup a click and treat every time your pup looks at the crate. If she needs a head start, try holding the treat near the crate and give her a click when she turns her head towards the crate. If your dog approaches the crate to get the treat, that’s great because that’s the next action we want. We want the pup to look towards the crate and approach the crate. We will click for both of this actions and reward.

Side note: Start feeding your dog inside the crate as well by putting her food bowl inside of the crate. Food is awesome. Food in crate means crate is awesome.

Step 8: Make being inside the crate even more interesting.
Once your dog comes near the entrance of the crate, try to hold your treat inside of the crate to lure her in, and click if your dog steps into the crate. You can also throw a treat into the crate in attempt to lure her in. Once your dog is in there, click and treat non-stop. Do it about 10 times in a row so the dog realizes that you like this behavior (her being in the crate) and she will continue to get a reward for it. Then start adding duration into the mix. Hold off on the treats and wait 10 seconds. If she stays in there after 10 seconds, click and reward (if not, go back one step). Do this several times. Slowly increase the duration up to 20 seconds, 30 seconds and even a minute. If your dog looks like a happy fella inside the crate with treats, you can start associating the word “crate” with this behavior. If your dog is sitting in the crate, say the word “crate”, click and reward. If not, take a step back, rinse and repeat. Be patient and don’t get frustrated. If you start to get annoyed or frustrated at any point, go take a breather. Sing the Hakuna Matata song from The Lion King. Just like how you don’t drive while drunk, you don’t train while angry.  

Take your time training, it’s not instant. 

Step 9: Staying in the crate with the door locked is the best thing ever.
When your pup is contempt with hanging out in the crate while you’re clicking away, it’s time to move on to the second phase of crate training - closing the door. We are going to use the same method here, progressively getting your dog to perform the action you want, little by little. First you touch the door, click and give her a treat. Even though you are rewarding without a reaction from your dog, what you’re doing here is conditioning how it’s ok for you to touch the door. Do that several times and start closing the door on her little by little until it’s closed and locked. Once it’s fully closed and locked, click away and treat if your dog is calmly in her crate. If she whines, ignore her and wait till she settles down. Click and reward her calm behavior or as soon as she becomes calm. We are training her that calm is good. To add duration to this, stuff a kong full of yummy treats and put that in the crate. Lock the door and the kong should have her focus for a bit. That teaches her that being in the crate is awesome and it also teaches her that the crate is a pretty cool place to be and being in there means she gets yummy food.

Hell, if you stuck me in a room and gave me an all-you-can-eat buffet, I’d stay and do backflips too.

Step 10: Rinse and repeat. 
Practice steps 6 to 9 everyday. If your pup starts regressing the current step you’re one, move back one step and start over from there. Practice makes perfect they say. Actually, practice makes a well trained puppy in this case.

The pup sleeps in the crate at night starting on day 1.
Something to consider while you’re crate training is that your puppy should sleep in her crate at night time from the first day she comes home. Even if she’s not fully crate trained yet, she should start associating the crate as her space and the place she needs to be during sleepy time. I’m not going to sugarcoat this but your pup will cry when you’re trying to sleep. Some pups cry for days, some pup cry for weeks and some for up to a couple months. It is now your job to be more stubborn and ignore it. Ignore it even if it means you won’t get a good nights rest. Kiss the sandman goodbye, you won’t be seeing that guy for a while. 

Why do puppies cry?
Your puppy will cry for a lot of reasons. She is crying because it's a brand new place. She’s crying because there’s brand new people. She’s crying because she’s not sleeping with her mother, brothers and sisters for the first time. She may also be crying because she has to go pee (I recommend a strict regiment of taking out your puppy every 1.5 hours, even at night when you sleep - check back for a potty training article). Crying sounds the worst. It sounds like baby satan trying to punch through your ear drums. But let’s be real. They are puppies, so they will cry and that’s ok.

What to do when they cry?
Ignore the crying. Trust me, if you give her any attention while she’s crying, you’re going to make it worse. Let’s look at it from the puppy’s perspective. I want attention, I’m going to cry. When I start crying, this guy shows up and pets me and gives me attention. Oh shit, he’s walking away, better cry again to get him to come back. Don’t give the the cry baby what she wants. You’ll only end up reinforcing that behavior and delay crate training. 

Tips for the crybaby. 

  • Tire the pup out. Go for a walk. Play some fetch. Pull on a tug toy. A tired pup will likely sleep through the entire night. Remember from the last article? A tired pup is a good pup.
  • Get a crate cover if you haven’t already. As mentioned earlier, it keeps it nice and dark so they puppy won’t see anything that may arouse them and are will usually be calmer.
  • Throw in your unwashed t-shirt and, if you have one, a blanket with the scent of her brothers and sisters. The scent will remind them of her bros. 
  • Get a clock that ticks and leave it next to the crate. The sound of a ticking clock reminds puppies of their mom’s heartbeat.
  • This one worked for me, I used a Bose Bluetooth speaker and played soft music on the lowest possible volume to keep her attention away from the fact that she’s not in her normal home.


If all else fails...
Yes, all of this failed for me. Even for my smarty pants of a dog Pippa. If all else fails, move her crate next to your bed and allow the pup to see where you are while you’re sleeping. Dogs are a social animal, so the fact that they see where you are should also calm them down. This is different from giving her attention. This is simply being in view so your puppy knows she is not alone. 

If you dog settles down with you in site, great… for now. Eventually, we want the crate back in the living room. Unless you want to leave it in your bedroom, that’s cool too. But for those who want their crate out of the bedroom, there is a trick for that. Every night, we will slowly move the crate a bit further from the bed. Maybe a foot a day. We will also slowly start to cover the entire crate with a blanket, little by little. The key here is to see how much you can get away with while she will still calmly go to sleep. For Pippa, this took about two weeks to get from the bedroom, out to the ball and into the living room. This is a game, and we are out to win it. 

Anyways, that’s crate training 101. It’s one of the most important things I think you can teach your dog. Crate training is very helpful with potty training which we will cover in our next article. 

What do you think? Am I missing anything? Any questions for me? Leave me a comment and please share if you think this was helpful. If it was total crap… well… shit. I'll be in my crate.

The Best Puppy Checklist. Ever.

So you’re ready for a dog - congratulations! If you’re reading this blog, it means you’re doing your homework. At this point you’re probably trying to find the best crate, collar, toy and etc.  Well, you’re at the right place. I did a ton of research, which involved some trial and error, on the best pet supplies, food and products. I’ve purchased the expensive stuff and the cheap stuff and made this comprehensive checklist so you don’t have to. This puppy checklist is pretty much pulled from my Amazon order history. Pippa is so spoiled. Let's get started.


1. A Really Good Collar. 
I recommend buying this in store. You have to feel the insides of the collar to see if there are any rough edges. If it scratches your fingers, imagine what a pain in the ass it is to have it strapped to your neck all day. You know that wool sweater your aunt gave you for Christmas that scratches your neck all damn day? Yeah, it’s kind of like that with a shitty collar. #burnitwithfire Your pup grows every time you blink. So make sure you get a collar that is adjustable in size. As for design and color, that's up to you.

2. A Really Good Leash. 
Remember when you tried to climb a rope in gym class as a kid and failed miserably? Remember the rope burn on your fingers? Ok, maybe that was just me, but that can happen if you pick a bad leash. This leash is padded for your precious fingers and has another padded handle to help teach your dog to heel. 

3. Poop Bags.
Don’t be THAT guy. You know the guy I’m talking about. The one that lets their pet take a shit on the sidewalk and then non-chalantly walks away. Clean up after your dog. It’s sanitary and it’s the right thing to do. This one comes with a dispenser that clips on to your leash. Plus, you’ll have enough to pick up dog crap for a year. 

4. A Two-Door, Adjustable Dog Crate.
You’re going to be moving your crate a lot (trust me). It just never looks like it’s in the perfect spot. It’s all about the feng-shui man. Having two doors offers flexibility on where you keep the crate. And being adjustable will help with potty training with your pup (an article we will cover later). Oh and keep a couple of worn t-shirts around and don’t wash them. Gross I know, but if you keep a couple of them in the crate, your dog will sleep better at night with your scent in there with them. 

5. A Cover for your Crate. 
Your dog naturally likes cavernous places, it’s in their DNA. A cover helps to keep your dog calm and relaxed by making the crate darker. Especially useful if your dog cries a lot.

6. A Collapsable Traveling Crate. 
This one is optional but if you intend to bring your dog with you to travel a lot, this collapsable crate can be assembled in 10 seconds. It’s pretty nice to bring a “safe place” with you for your dog. But be aware, this is not adjustable so get one that’s big enough for your dog to turn around in and no bigger. 

7. Nature’s Miracle Enzyme Stain & Odor Remover.
Unless your dog is the rebirth of Eistein, he’s going to have an accident. Get the big bottle because you will need to clean up your dog’s pee and poop real good so they don’t create an elimination area. We fill a couple of these spray bottles and keep in them in different rooms for convenience. 

8. Clickers for Training. 
I recommend clicker training. It’s consistent and super effective. These are great clickers because you can keep them around your wrist and they have a solid sound. When you own a puppy, you will always have a lot of things in your hands or pocket and having this thing around your wrist is a lifesaver. Pippa gets praised all the time on her training while she is only 4 months old and I believe it’s truly due to her clicker training. I keep one in my jacket pocket and a couple around the house so I can immediately tell her she’s doing a great job if I catch her being good. 

9. A Treat Pouch for Training.
This pouch is awesome. Your can loop it on with your belt, or clip it to your pants. It also has a key clip so you can hang it up. I prefer this pouch because it has a hinge so you can quickly close it so your treats do not fall out while you bend over to praise your dog. Plus, I look like a real pro when I’m walking around with one. It’s a cool look… right? Guys?

10. Kongs. Lots of Kongs. 
The holy grail of all dog toys. The King of them all. Other dog toys will bow down to this one. Kongs are a great toy in general but even better when it’s stuffed with food. Great way to stimulate them with their food to tire them out and keep them busy. Also great for separation anxiety (an article we will cover later). But definitely keep a couple around, stuff them with food and leave them in the freezer for a quick treat if you’re in a hurry. (Check back on different frozen food mixes to stuff into the Kong for a stimulating lunch)

11. A Bob-A-Lot Interactive Food Toy. 
This toy is a great way to stimulate your dog mentally and physically. I prefer the Bob-A-Lot one over the Kong Wobbler because you can adjust the level of difficulty with the Bob-A-Lot. This toy will teach your dog to work for her food, be patient and also to be a bit clever. You always want to stimulate your puppy and tire them out mentally and physically. A tired puppy tend to be less destructive. Tired puppy = good puppy.

12. Jolly Tug Squeaky Toy. 
You can play fetch with it. You can play tug with it. And it squeaks. It’s an all in one toy at a good price. What more can you ask for?

13. Chuckit! Balls- The Best Balls Ever. 
Man’s best friend loves to fetch. But man’s best friend also likes to destroy things with their teeth. These balls are almost indestructible. And you want toys that are indestructible. If you can’t throw for shit, get the launcher with it and you’ll put most baseball players to shame with how far you can throw the ball.

14. An Infant Gate.
Some dogs do well in crates when you’re not home and some do not. Pippa does not do well in the crate but that’s ok. We “pen” her to an area in the house with some treats and toys and she loves it. We must’ve bought 7 gates and they were all junk and really cheaply built. We purchased this one in all different sizes and they are super flimsy - if you have a medium dog and bigger, I feel like this would collapse down quite easily. We ended up buying this one which is a solid metal gate. It feels nice, it looks nice, it's really sturdy and it’s adjustable. Did I mention that it looks nice? But beware, once your dog is fully grown, the gate becomes a mere suggestion. Your dog can jump twice as high when you’re not looking.

15. Deshedding Tool. 
You will find fur everywhere. It’ll be in your food, on your clothes and even on your office desk at work. They are literally everywhere. This tool works really well in keeping that under control and it’s a great price. They compete against the FURminator which is a bit more expensive but the only difference is that the Furminator has a button to push the hair off the comb which I can do with my own fingers. Brushing your dog not only helps reduce the chance of fleas and ticks but it makes them soft #itssofluffy

16. Nail Trimmer. 
If you can hear your dog’s nails clicking when they are walking, it’s time to trim them. Most people are nervous about cutting their dog’s nails. Well, it’s just all about practice and this trimmer is great because it has a stopper plate built in so you can’t cut too deep. Practice makes perfect. It also keeps more greens in your pocket from paying someone else to do it. So practice.

17. Bathing Shampoo. 
There’s a lot of debate on how often you should bathe your dog. I’ll make this one easy, when the furball is dirty, bathe her. But I’m not cold-hearted either. I did a ton of reading, and this is the stuff that should keep your dog’s coat clean but not irritate her skin at the same time. And it smells nice which is a plus.

18. Food Bowls. 
I recommend some non skid (rubber bottom) bowls that are nice and wide so your dog can’t tip them over. Dogs also eat really fast. Trust me, a puppy can literally inhale the food if you don’t slow them down. But I find that by throwing a ChuckIt Ball and a Kong in the bowl, that typically slow them down. The food bowl I linked isn’t non skid, but they fit into a nice stand that is height adjustable so they won’t move. If you have a dog that will get big and tall, get a stand for your food bowls and they’ll have an easier time eating.

19. Food Vault. 
This food vault has a gasket (fancy word for a seal) built into the lid so dogs can’t smell their food. Which means they won’t destroy their container to get to their food. The lid is also HUGE so it’s easy to open and close. Plus they are stackable and pretty heavy duty. You don’t want to leave bags of kibbles laying around. Trust me. 

20. Speaking of Dog Food, here is a Solid Choice. 
Listen, you should probably do your own research on this (and you probably will). I recommend this site - Dog Food Advisor. They do their homework and they break down every ingredient for some of the most popular dog food choices. They will highlight any questionable ingredients in red. Your dog only lives so long so don’t feed it crap. Feed them 5 star pet food only. Please. Taste of the Wild (the one I linked above) above is a 5 star dry formula and is quite affordable compared to most 5 star dog food. However, if you want the best of the best, there is no better choice than Orijen. But at the end of the day, do your dog a favor and feed them the good stuff.

21. Odor Free Bully Sticks. 
I like grass fed burgers. My dog probably likes grass fed bully sticks. If you don’t know what a bully stick is, it’s a roasted, dried out cow penis. So naturally, they smell pretty disgusting. But these ones do not smell and your sensitive nose will thank me. These bully sticks are much cheaper when you buy in bulk. I personally don’t think it helps THAT much with tartar build up but it’s definitely a treat that will keep them busy for a LONG time. These sticks are high in calorie so watch how many you give your dog. Did I mention they don’t smell like sweaty balls?

22. A Food Dehydrator. 
You think gas is expensive? You should see me at the dog treat aisle as I’m shelling out cash for the best dog treats. Wait, did I mention I spoil the hell out of the dog yet? Pippa eats the good stuff, but the good stuff costs an arm and a leg. I’m a bit of a foodie and I like cooking so yeah… I make my own dog treats. And it’s not hard. Go buy a pack of chicken breast (or lean beef like top round), cube it up to bite size pieces, maybe throw in just a pinch of salt, lay it out in this dehydrator, let it work it’s magic over night and voila. You have the best dog treats in the world. You know exactly what went into them, and it’s nothing but protein. Best of all, your dog knows it’s the good shit and Fido will do back flips for it. 

You’ll notice I didn’t recommend puppy training pads. Personally, I find training pads to be a waste of time. Literally. Training pads teach your dog to pee INSIDE the house. Half of the time, they’ll miss the pee pad completely anyways. It’s OK for your dog to have an accident inside the house, just clean it up and move on. 

Thanks for reading this blog guys and I hope you find this checklist useful. If you find this helpful, share it with your friends, wives, husbands and everybody else. I will expand on some of these items in future blog posts but if you have any questions, hit me up in the comments below. 

So You Want a Dog for a Pet? Part III. Where Should I go to Adopt a Dog?

Now that you know it’s a pain in the ass to own a puppy and how to pick the right one, let’s talk about where you should go to adopt your furry friend. We did a ton of research and eventually adopted Pippa from a breeder.

But before we talk about breeders, let’s talk about where to NOT go. We’ve all been there, walking around the mall wondering how you’re going to pay off your credit card bill from all the shopping you just did. All of a sudden, right next to Build-A-Bear, a puppy store. Holy shit, yes. A puppy store. This is what dreams are made of right? The convenience of buying a puppy at your local shopping center!
No. No. NO. Do not EVER buy a dog from a puppy store. 11 out of 10 puppies from a pet store are from a puppy mill. If you don’t know what a puppy mill is, I can take care of that.

Sickening. 

Puppy mills breed dogs in the worst possible living conditions. These dogs can barely turn around in their small piss-covered cages. Nobody cleans up after them and they are often undernourished because all they eat is their own shit. The puppies that come out of these mills are often in bad health with behavioral problems that are a nightmare for first time owners. 

Pet Stores (especially ones in a mall) often purchase their puppies from a puppy mills with fake paperwork. You’re only going to be supporting puppy mills and setting yourself up for a bad time if you buy a dog from those places. Check out the yelp reviews on this one particular store.  There are sites out there dedicated to the anti-puppy stores and anti-puppy mills.

To sum up, no puppy stores. 

That leaves us with two options. A rescue shelter or a breeder. 

Rescue Shelters
Consider going to your local rescue shelter to save a dog. Dogs from a rescue shelter will often have all their vaccine shots with a full vet check. They are also often spayed or neutered already which will save you a ton of money. Shelters are often excessively filled with amazing dogs who make great pets. If you’re interested in a pure-bred dog, there’s plenty of those at the shelter as well. The adoption fees are typically low. Give shelters a look, you won't be disappointed and you will save a life. 

Breeders
Breeders are people who specialize and breed in a specific breed of dog. How’s that for using the word to define the word?

This one is a bit tricky but you just have to do your homework. There are faux-breeders out there that are churning out dogs just for the sake of making a buck. They often have living conditions that are just as bad as puppy mills. Puppies from these “breeders” often have the same health and behavioral problems from puppy mills. Fear not, they are often quite easy to spot and I’m going to tell you how to spot a faux-breeder from a reputable breeder. Here are 12 things to look for in finding a reputable breeder:

1. Can your breeder provide you with the family history (pedigree) of your future puppy?
Breeders care about the betterment of the breed. They want this breed to be healthier. Keeping tabs on the pedigree shows the breeder cares about creating the best of the best. You want the best of the best.

2. Does your breeder have test results for the parent dogs?
Along with knowing your puppy’s pedigree, breeders will typically provide test results on the parents on genetic problems the breed is commonly known for. For example, cataracts can effect Australian Shepherds - there are tests that can be performed on the parent dogs to determine the chances of this health issue on future puppies with almost a 100% accuracy. The more you know, the happier your future wallet is. 

3. Are you allowed to meet the parent dogs?
A reputable breeder should have no problem letting you visit the parent dogs (unless they are busy nursing their newborn puppies). Meeting the parent dogs will provide you with insight in how well the breeder takes care of their dogs. It’ll also provide you with glimpse of your future puppy’s temperament and personality. If your breeder says no, run, don’t walk. 

4. Can your breeder show you the living facilities of their dogs?
If you breeder does not allow you to visit the living facilities of their dogs, this is a red flag. You should still be allowed to visit the living facilities of the dogs. Be sure to inspect for cleanliness. Bring a white glove. The only thing you should be finding is fur and food. 

5. Can your breeder provide referrals to owners of their previous litters?
The only reason your breeder would say no is to protect the privacy of other dog owners. But let’s face it, people love to talk about their pets. I do. Your breeder shouldn’t have any problems finding one of their clients to offer them a good referral. 

6. Does your breeder specialize in multiple breeds?
This one is tricky. Some breeders do specialize in multiple breeds, but 9 out of 10 breeders typically breed only one type of dog. It’s like the saying goes, a master of all is a master of none. 

7. Does your breeder recommend positive reinforcement training?
Dominance theory is out. The Caesar Millan shit you see on TV? It’s all crap. Positive reinforcement training and understanding dog behaviors is where it’s at. If your breeder isn’t keeping up to date with the best training methods, your breeder is probably not up to par. Be sure to check back for articles on clicker and positive reinforcement training. 

Speaking of clicker training, these are the clickers I recommend. They have a wrist band, a solid click and are relatively cheap. So get a couple and have them laying around for training when I have my training articles up. I’ll also have a puppy gear checklist article coming soon with the best gears I’ve purchased and which ones to avoid. 

8. Does your breeder produce more than a few litters a year?
If your breeder produces more then 4 litters a year, you should be asking why. Do they have the demand? Are they doing it just to make a pay check? Taking care of puppies for 8 weeks is a lot of work. If they have more than 4 litters a year, that’s going to impact their ability to provide adequate care to all their dogs.

9. Can your breeder guarantee your dog’s health for a reasonable time?
If they have a strong pedigree and know what they are doing, a reputable breeder should be willing to guarantee a healthy puppy for the first couple of months and some even up to a year. 

10. Does your breeder allow puppies to go home with you before 8 weeks?
Your puppy should not be allowed to come home with you until it’s at least 8 weeks old. Your puppy needs to be around siblings to learn to socialize with other dogs (learning bite inhibition, not to resource guard and etc). Socializing is a huge subject on it’s own and I’ll definitely write an article about this in the future so be sure to check back. But picking up your puppy after 8 weeks allows your puppy to mature with her litter-mates which leads to a much better pet.

11. Will the breeder provide the puppy with a vet check and deworming protocol before going home with you?
Yes they should. 

12. Can you contact your breeder once your puppy goes home with you?
Your breeder should build a relationship with you. This isn’t a one night stand folks.

Did I miss anything? If you have any questions, leave a comment below!